How to Pin Microsoft Edge to Taskbar Windows 10
Pin Microsoft Edge To Taskbar
There's no "Pin Microsoft Edge to taskbar" wizard in Microsoft 10, other than the one you know and see when you look in the mirror ;-)
If your Windows 10 doesn't have the Microsoft Edge shortcut sitting on your taskbar, you'll have to put it there yourself. Luckily that's very easy to do. I'll show you how in the next few easy steps. In an effort to explain the steps in a situation similar to yours, I've started out with a Windows 10 taskbar without the blue "e" Microsoft Edge icon:
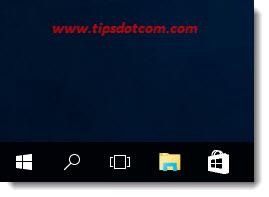 Windows 10 taskbar with missing Edge icon
Now, in order to pin Microsoft Edge to taskbar, simply click the Windows 10 start button right-click the Microsoft Edge tile in your start menu and select "Pin to taskbar".
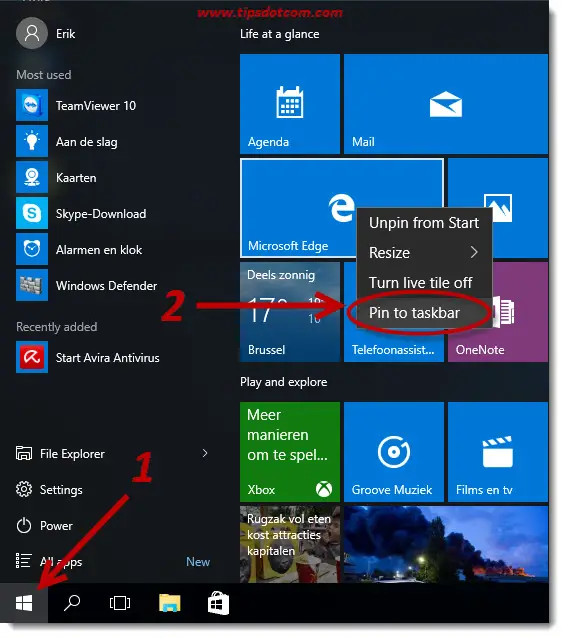
As soon as you pin Microsoft Edge to your Windows 10 taskbar using this method, you'll notice the blue Edge icon on your taskbar. From now on you can launch Microsoft Edge with a single click on the Edge icon on your taskbar.
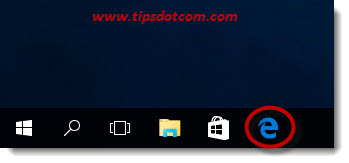 From now on you can launch Edge with a single click
In the unlikely event that you don't have a Microsoft Edge icon in your Windows 10 start menu, you can try the following, slightly different method to pin Microsoft Edge to taskbar. Please note that I have removed Microsoft Edge from my start menu in the screenshot below, as I am describing the steps to pin Microsoft Edge to your taskbar when Edge is missing from the Windows 10 start menu as well.
Click the Windows start button in the lower-left corner of your screen, which will bring up the Windows 10 start menu.
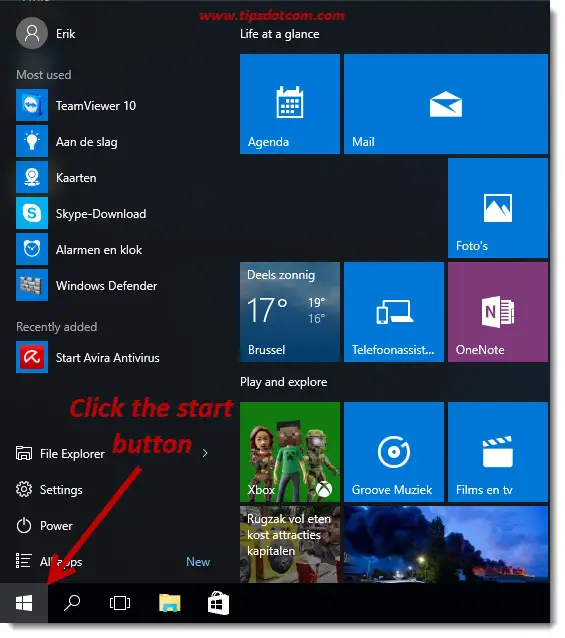
Now, with the Windows 10 start menu on your display, simply start typing "edge" (without the quotes). This part may be just a tad confusing, as it feels as if you're typing in a void. Don't worry about the fact that there is no input field with a blinking cursor indicating where your text will appear. You'll notice as soon as you start typing the letters "edge" that Windows' search function will take over and show you a list with matches for your search. Immediately this list will show Microsoft Edge at the top, as illustrated in the image below.
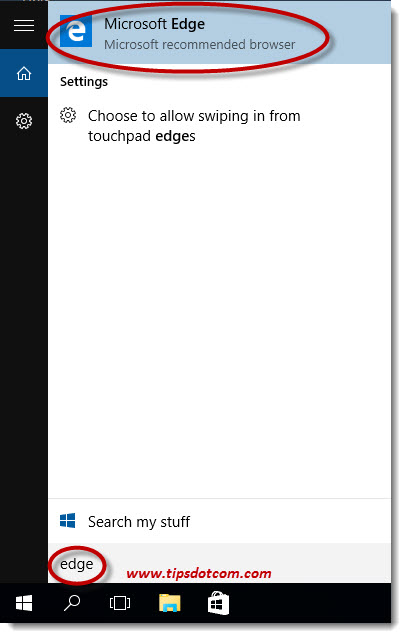
Now you can right-click the Microsoft Edge icon at the top of this list and select "Pin to taskbar" in order to secure the blue "e" Edge icon on your taskbar.
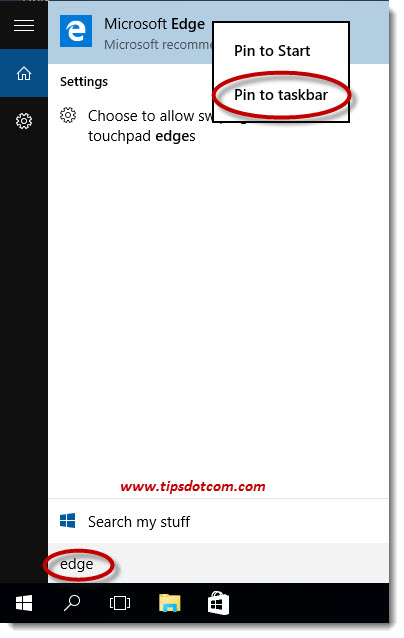
Of course you can repeat the previous steps and select "Pin to start" as well if you want to put Microsoft Edge in a fixed location on your Windows 10 start menu as well.
Please note: if you use the above steps to pin Microsoft Edge to your start menu, Edge will probably appear all the way at the bottom of your start menu. If you're not happy with its location in your start menu, please refer to my article on how to customize your Windows 10 start menu.
Pin Microsoft Edge To Taskbar At Another Position
Similarly, if you pin Microsoft Edge to your taskbar, you'll probably notice that Windows puts it there as the last icon in the row (see image below).
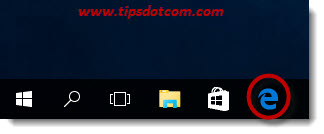
If you don't like this position or you want to move your Edge icon more to the left, simply click and drag the icon to your preferred location. As you drag, you'll notice that the other icons on your Windows 10 taskbar move out of the way to make place for your Edge icon. You can drag the icon to any position you want, but please note that you won't be able to drag anywhere past the "Task view" icon or the "Search Windows" icon on the left.
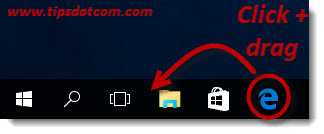
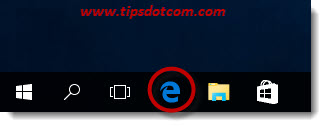
The image below shows the Microsoft Edge icon in its new location, in between the "Task View" icon and the Windows Explorer icon.
With the exception of the "Task View" icon and "Search Window" icon, you can drag and drop all icons on your task bar in the order you prefer.
I hope this article was helpful. Please take a moment and leave a short comment below, I'd appreciate it, thanks!
If you've enjoyed this article or found it useful, I'd appreciate it if you'd let me know by clicking the Like (or Share) button below. Thank you!
How to Pin Microsoft Edge to Taskbar Windows 10
Source: https://www.tipsdotcom.com/pin-microsoft-edge-to-taskbar.html
0 Response to "How to Pin Microsoft Edge to Taskbar Windows 10"
Post a Comment